Pumpkin Planters

Fun decorations for the Holidays
DIY! Pumpkin Planter. Turning a pumpkin into a planter is a fun, inexpensive way to decorate for October & November. Have fun with this project! Kids will love to get involved and it makes a great center piece for your table, porch, patio, Halloween party… you get the idea.
Here’s what you’ll need:
- Pumpkin
- Kitchen knife to cut top of pumpkin or make into a jack-o-lantern.
- Large spoon or soil scoop.
- Pumpkin carving sets/templates
- Felt-tip pens. Color sharpies.
- Potting soil and/or decorative moss.
- Nursery container (plastic pot)
- Plants to fill your pumpkin.
- Newspaper

Now it’s time to make your pumpkin planter
- Select a fresh pumpkin that is round in shape and not too tall.
- When your ready to start your project, gather all your supplies and lay down newspaper for easy clean up.
- Cut all the way round the stem to remove the top of the pumpkin. Make your opening large enough to accommodate your flowerpot.
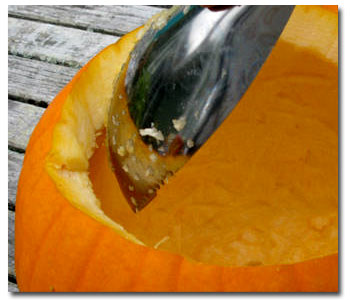
- Remove the stem and scoop out the seeds and pulp form inside using a large spoon or soil scoop. Carve out the flesh of the pumpkin under the edge of the opening. This makes it easier to put the plant, still in its plastic pot, in the hole.
- Cut a small drainage hole near the bottom of the pumpkin, about the size of a quarter or slightly larger. This will prevent water from sitting in the bottom of your pumpkin planter which would cause your pumpkin to rot.
- Now, your going to add your plants. Get a black nursery pot or use one that came with the plants you purchased. Use a single plant or combine multiple plants into your garden pot. Use colorful annuals for a beautiful center piece. Try sage, grass & succulents to give your pumpkin planter some personality or wild, crazy hair!
- Place the pot inside and cover around the top with decorative moss if you wish. If your pot is too tall, place some moss or recycled material at the bottom of the pumpkin before placing your nursery pot inside. If your nursery pot is too tall, add soil and decorative moss to cover the nursery container.
If your pumpkin planter is outside you can water your plant as needed directly in the container while it sits in the pumpkin. If your planter is an inside decoration, we recommend removing the plant from inside the pumpkin, watering and then replacing after it as drained out a bit. Make sure to use a plate or nursery tray under your pumpkin to protect the surface below it.
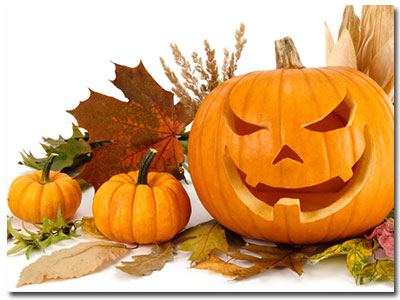
For fun, paint a face on your pumpkin or make a jack-o-lantern pumpkin planter! Carve a fun face using these fun pumpkin carving templates. Be sure to remove your plant from the pumpkin before carving.
Note: You can place potting soil directly into your pumpkin and plant without using a nursery pot. Just be sure to use a tray under your plant at all times if used inside the home. Make sure to bring your pumpkin planter outside to water. Use a few smaller holes at the bottom for drainage rather than one larger whole. Make sure not to let your planter get too soggy by over-watering. You won’t be able to easily carve a face into your pumpkin with this method (soil may spill out of the face) but you can still paint a face on it!
When your pumpkin planter starts to break down and rot (after about a week), you can remove your plant and put them directly into the ground or move them to a new pot.


