


Building Your Garden Bed Kit
In southern California we can plant fresh veggies year-round. Garden bed kits are designed to make it easier for you to have an easy-to-use, attractive raised garden bed, without the need for extra labor such as cutting the wood, measuring and trying to figure out what materials are needed.
Garden beds provide a way to garden in small spaces or for areas where the soil is lacking nutrients. They come in a variety of sizes with options. We offer a very well made garden kit in two sizes. 4ft x 8ft and 4ft x 6ft both with a height of 12 inches. A leg kit is also available which will bring your raised bed up to a more comfortable gardening position. This is an optional accessory and either way you will have a beautiful garden bed once finished.
Here’s what you’ll need:
- Garden Bed Kit from your local garden supply store. The kit will include the wood and hardware.
- Select the location for your garden bed.
- Garden soil. The type of soil you need will depend on the plants. In this case, we planted vegetables.
- Tools: Drill
- Shovel or trowel; something to mix your soil up with.
- Drip Irrigation. This is optional but will make watering even easier.
- Your plants. See our Vegetable Planting Guide and Flower Planting Guide
Building Your Raised Bed
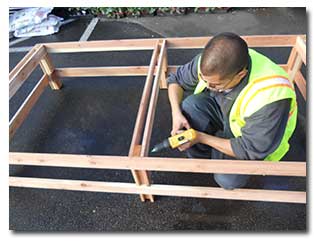
All raised beds come with manufacturer instructions. Once you have gathered your supplies, you are ready to start.
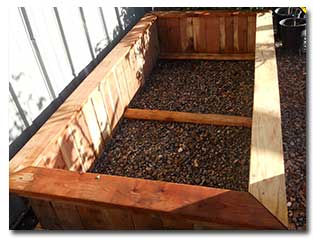
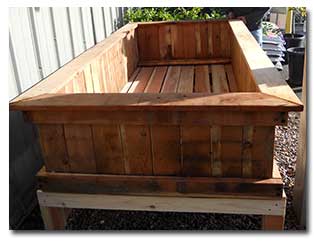
Pick the location for your raised garden bed and take out all of the contents in the box. You should have hardware and four sides. Follow the manufacture instructions and piece each side together to form the shell of your garden bed.
If you did not purchase the leg kit to raise your garden bed, than your garden bed is built. If gophers are a problem in your area, consider placing wire mesh at the bottom of the bed before filling your bed with soil. Go to “adding the soil” if your bed is built and you are not adding the leg kit.
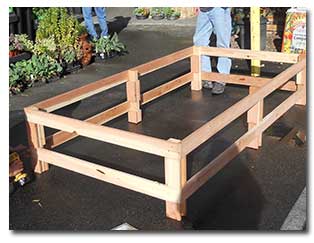
Building Your Leg Kit
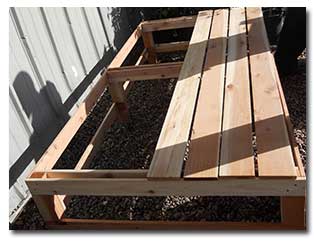
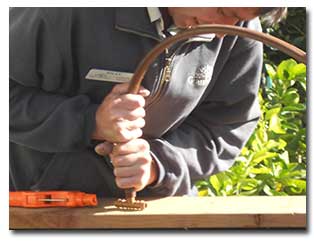
As with the garden bed kit, follow the manufacture provided instructions. You will need your drill. Lay out all hardware and wood pieces. Use a large, flat area to build your leg kit.
Build the four sides as instructed then add the center support.
Next, add the top panels to form the deck which will hold your garden bed.
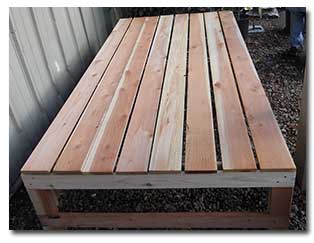
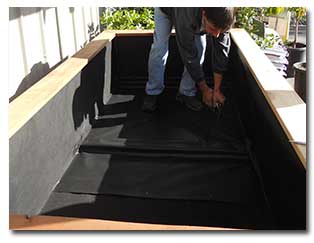
Now, place your garden bed on top of your built raised leg kit. Add fabric so that your bed will drain, but your soil will stay in place.

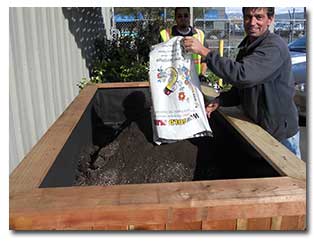
Adding the soil
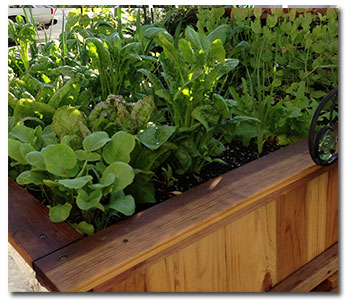
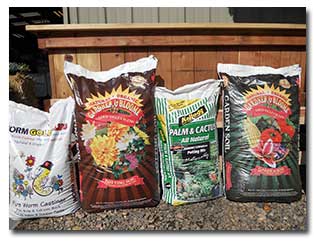
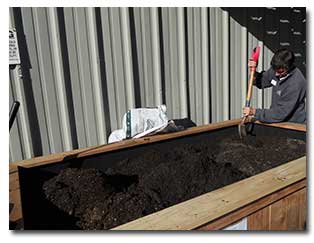
Once you’re fabric is complete, add the soil. We used a combination of quality soils. We used a mixture of Worm Gold Plus®, Gardner & Bloome® Eden Valley Blend Potting Soil, Gardner & Bloome® Eden Valley Blend Garden Soil and Kellogg® Palm & Cactus Mix. Use a shovel or short handled garden tool (easier for beds that use the leg kit) to mix your soil in thoroughly. Now you are ready to add your transplants or seeds.
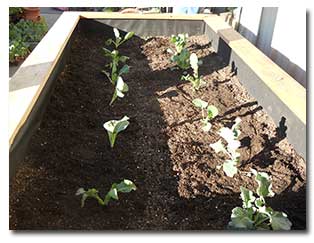
When using transplants, remove from the container and place in rows about 4-6 inches apart. If sowing directly from seed, please refer to the seed packet. Vegetable Planting Guide
You may decide to hand water your new vegetable garden. Make sure to water regularly during dry times and that your soil drains well. Don’t let the soil get too soggy, but don’t let it dry out either.
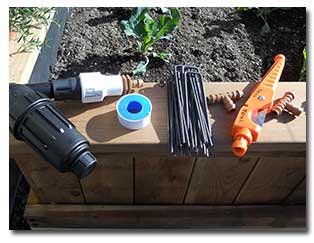
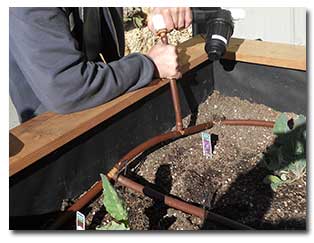
Adding Drip Irrigation (optional of course)
If you decide to put in a drip irrigation system, our garden pro’s can help you with product selection. By using a drip system, you eliminate the need to hand water, which saves time and will be more accurate.
Here are the steps we took when adding our drip irrigation:
- Netafim® Techline® tubing ran into rows to provide the water.
- A pressure regulator with 30-40 psi was used.
- A filter to keep the emitters from plugging up.
- Tees & elbows to complete the loop.
- This was connected to a water hose which serves as the main supply line.

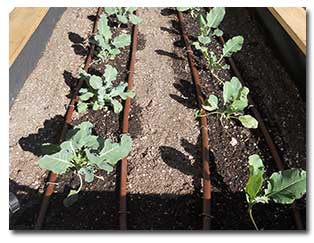
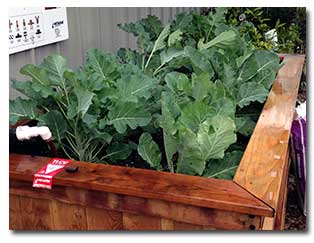
The raised garden bed and irrigation was added November 19,2012. The last picture (right) was taken December 18, 2012. Look at how fast they grew!
The garden bed kits available at Grangetto’s are available upon request. Please visit your local Grangetto’s store or contact us for more information. You can see a working display at our Escondido and Encinitas locations!


