


The Wonders of Indoor Gardening
Start seeds now for transplant in fall
Just because it’s nearing the end of summer and edging toward fall, gardening season isn’t over yet! There’s a huge variety of cool-season flowers and vegetables just waiting to be planted. Starting plants from seed indoors is not only fun and easy to do but also rewarding, since it allows you the opportunity to grow plant varieties that may not be available from local growers. The opportunities are endless with many unique varieties of flowers and vegetables available in seed form.
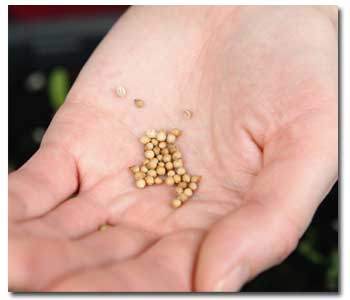
Come visit the seed department at your local Grangetto’s. Once you’ve made your selections, check the back of the packet for basic information such as germination time and an estimate of how long to grow the plants indoors before transplanting into the garden. Determine the average safe date for transplanting your plants in your area, and then count backwards to find out how early you can start your seeds indoors. If you have a greenhouse or cold frame to transplant into, adjust accordingly.
The easiest and best containers to use are Grangetto’s Speedy Roots, pre-filled seed starter trays. Another option is to use peat pots, but plastic or clay pots will do just fine, too. If using containers from a previous growing season, wash them with a solution of one part household bleach to nine parts water to sterilize them; this helps prevent the transfer of disease. Fill the containers with a light soil mix with good drainage and moisture-retention properties. Potting soil is best for this. Wet your soil mix and allow it to drain before sowing the seeds into your containers.
Put your soon-to-be seedlings in a warm location in your home and give them plenty of light, whether it’s a window or a hanging light. Most plants need moisture and warmth to germinate, but need light to grow once they sprout leaves. Plain fluorescent light bulbs are fine when starting seeds but consider using at least one “grow light” tube if you’re going to keep the plants under lights for an extended time. If you’re trying to get full-sized plants by transplant time, you’ll need a grow light or a very bright windowsill. Remember that seedlings quickly become weak and leggy if they don’t receive enough light.
Seeds generally need a soil temperature above 65º to germinate. If you have trouble maintaining that temperature, consider using a heating mat. Covering your containers with plastic helps hold in moisture and creates a humid environment that encourages seeds to germinate.
Make sure your plants don’t get too hot under the plastic, especially if you have the containers in a sunny area or under a warm light. Remove the plastic as soon as you see any signs of germination. Keep the soil mix evenly moist, using lukewarm water if possible. Water very gently to avoid disturbing the tender seedlings.
When your seeds germinate, they’ll send up a sprout with two seed leaves called cotyledons; after that, true leaves follow. Begin feeding your seedlings weekly with a half-strength solution of fertilizer (ask us which is best for what you’re growing) when the first true leaves develop. Continue feeding the seedlings until they are ready to be transplanted. The plants are ready when the entire root ball is held together by the plant roots.
Harden off your plants before transplanting them. This is the process of getting them used to the light, humidity, and temperatures outside. Start by placing your seedling containers outdoors in a shaded, sheltered location for a couple of hours per day. Gradually increase the time spent outside by an hour each day for at least a week before transplanting the seedlings.
After transplanting, if your neighbors ask where you bought all those wonderful plants, just tell them, “They’re truly homegrown!”


